My First Adventure with AWS: Launching an EC2 Instance and SSH Into It
There will be no real progress if all we learn is theory without hands on experience.


Diving Into AWS
Let’s face it, all the theory behind cloud computing can feel a bit overwhelming but necessary. I've heard about AWS and its robust features, but where do i even begin? Well, after consuming a mountain of information, I finally decided to jump right into action and create my first EC2 instance. If you're new to AWS like I was, this post will walk you through my experience—in hopes that it makes your journey a bit easier.
Creating My First EC2 Instance
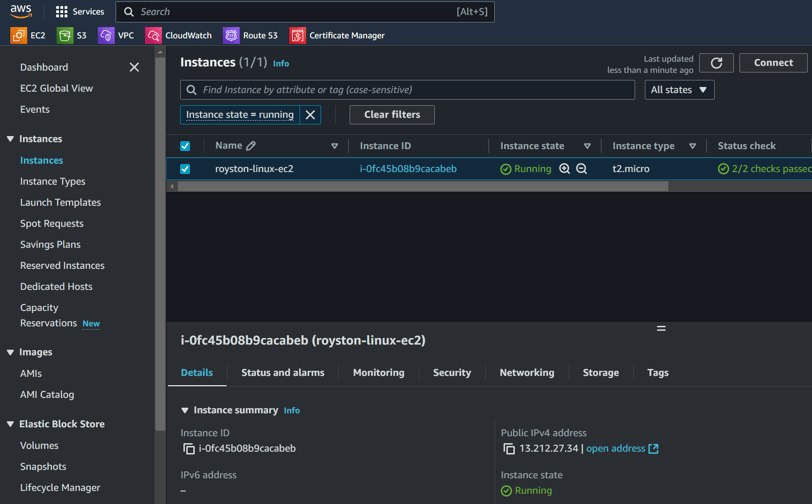
First things first, I navigated to the AWS Management Console. It's like entering a new tech playground—everything looks sleek and organized. I chose EC2, also known as Elastic Compute Cloud, because I wanted to learn the basics of cloud computing while having the power of scalable virtual servers at my fingertips.
The user interface is quite intuitive. I selected the desired region (you might want to pick one that's closest to your physical location) and clicked on the 'Launch Instance' button. Before I knew it, I was selecting an Amazon Machine Image (AMI) to kick things off. For a newbie, the Amazon Linux AMI seemed like a safe choice. It has a lightweight footprint and is perfect for testing out new ideas. Best of all, FREE TIER!!!
Next, I configured my instance type. I opted for the t2.micro, which is also eligible for the free tier—perfect for those like me who are just starting out and don’t want to break the bank! After a few clicks to set up my security group, I was ready to launch my very first EC2 instance. I barely contained my excitement as I hit the 'Launch' button.
Conclusion
In just a few steps, I transitioned from a theory-heavy understanding of AWS to actively engaging with my first EC2 instance. It felt incredible to take that leap into the cloud. Whether you’re a seasoned techie or a wide-eyed beginner, diving into AWS allows you to explore endless possibilities.
SSH Into My EC2 Instance with PowerShell and WSL
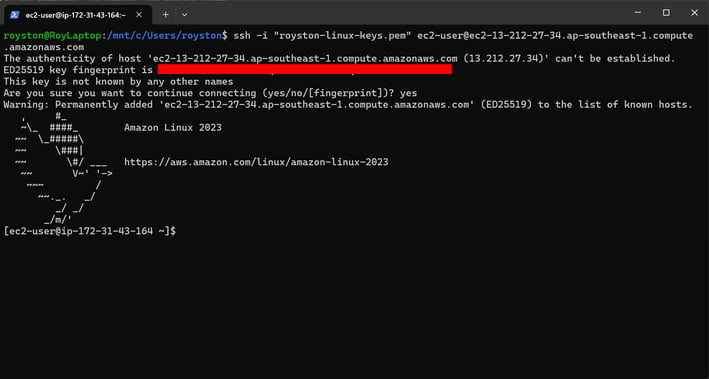
Now that my instance was up and running, it was time to connect to it. I had read up on how to SSH into an EC2 instance, and as a Windows user, my plan was to utilize PowerShell along with Windows Subsystem for Linux (WSL).
First, I opened PowerShell and enabled WSL, which is a feature that allows you to run a Linux environment natively on Windows. This step was crucial since traditional command lines on Windows can be a bit tricky when it comes to SSH. With my WSL set up, I quickly navigated to my .pem key file that I downloaded when creating my instance. Remember, protect your private key because it's your passport to the cloud!
Finally, I typed the SSH command in WSL: ssh -i /path/to/your-key.pem ec2-user@your-instance-public-dns. Just like that, I was connected to my EC2 instance! It felt rewarding to see that command work without a hitch after hours of reading about it. I navigated the Linux shell, felt like a tech guru, and realized that the sky is the limit when it comes to what I can build on my EC2 instance.